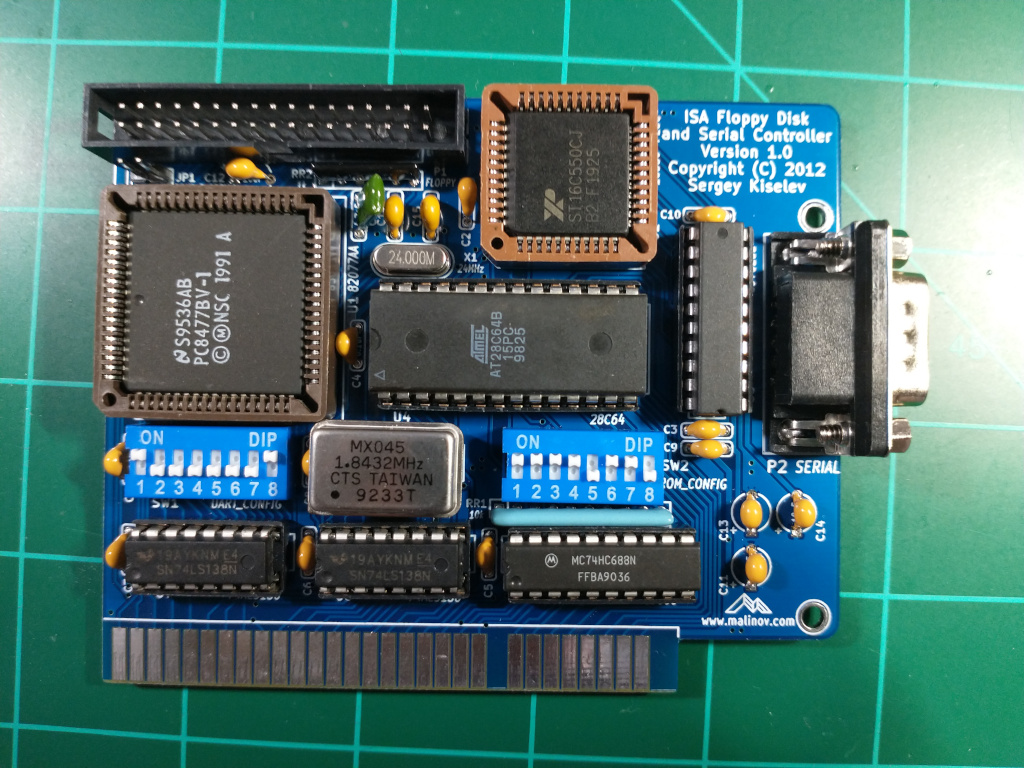
ISA Floppy Disk and Serial Controller
Introduction
This is a ISA Floppy controller card which allows you to use a standard mechanical floppy drive or a goTek floppy emulator device on your IBM compatible computer.
How to Purchase
This kit is available on my eBay store https://www.ebay.com/usr/numberf55/ or for an additional discount contact me at support@noami.us or 1 347 604 2083 with your name and order details I will provide a total and instructions for payment by check. Once it clears the item will be sent out.
Board Assembly
Install the shorter components first this means installing them in the following order
- 24 Mhz Crystal
- Capacitors, resistor arrays
- DIP Sockets
- DIP Switches
- Square sockets
- Floppy connector (when installing on the pcb the notch should be facing the bottom)
- 9 pin serial header
Post Assembly & Cleaning
Once you have your board assembled you will need to clean the flux off the board. Depending on the flux you used some flux can remain conductive and result in computer glitches.
I have found the following procedure to be very effective in cleaning the board of any type of solder flux.
- Some flux are water soluble so just rinse the back side in the sink with some soapy water and an old tooth brush. Try not to get water on the front side. Little water is okay.
- If that doesn't work then Spray WD40 on the back of the board (not kidding). Then use dish washing detergent with the brush to remove the WD40.
- Perform the final rinse.
- Use a hair dryer to to dry the board and let it sit for few hours before proceeding to the next steps.
DIP Switch settings
A good starting point is to set the dip switch settings in the image.
Note: Only one of SW1.1 - SW1.4 should be ON. All switches can be off if software doesn't use interrupt based I/O. Note: One and only one of SW1.5 - SW1.8 switches should be ON.
For the ROM Address you can switch all of SW3 ON except 5. This will put the floppy controller ROM at address 0xC8000. If you have an XTIDE make sure its at a higher address than this.
Once the settings are finalized and everything is working as expected put the EEPROM into read-only mode by switching off 2.2. This will prevent spurious bus signals from overwriting your EEPROM.
See the original designer's website for detailed configuration of the DIP switches.
Initial Boot and Configuration
Check for shorts when plugging in the floppy controller into a slot for the first time.
The floppy controller comes with its own BIOS extension ROM which controls the floppy. In this case you would need to either disable the extension ROM or disable the floppy in your system BIOS. You can not have both enabled. This is the most common issue new users.
After your system boots you will be prompted "Press F2 to run the Multi-Floppy BIOS configuration utility...". Over here you can remove the floppy if required.
When Entering the p command it should print FDC 1 03F0, IRQ6, DRQ2 and nothing else. Using this configuration it booted successfully into MS-DOS.
If your system is still not booting please check your boot floppy by using it to boot another system.
Troubleshooting
The floppy drive works but the C drive is not detected.
This can happen if you have both the XT-IDE and floppy ROM Extensions installed on the same system. You will notice that the usual XT-IDE boot screen will not show.
If you have both the floppy controller and xt-ide, try putting the floppy controller extension ROM on 0xC8000 SW2.3-7 (11011) and the XT-IDE on 0xCA000 SW2.3-7(11010) which is a higher address.
System hangs during boot
The floppy BIOS needs to be configured (Press F2 during boot) see instructions above.
Multi-Floppy BIOS message does not display
After your system boots you will be prompted "Press F2 to run the Multi-Floppy BIOS configuration utility... this will get you into configuring the floppy on the controller card. Define your floppy drives there. Then on reboot it will print
Found BIOS extension ROM at C8000 or whatever address you selected, initializing...
Multi-Floppy BIOS Version 2.2. Copyright (C) 2010 ... FDC 1 at 03F0, IRQ6, DRQ2 Drive 0: ...
If you don't see these messages, or don't have option to press F2 then there is conflict in the BIOS extension ROM address you may want to define it at another address location.
If you are confident there are no shorts on the floppy controller you may want to try this controller card on another machine to isolate the problem.
Based on my testing address conflicts will likely erase the EEPROM so before plugging it in make sure there are no conflicts. If your EEPROM got erased then download the firmware bin file and use a programmer to re-program.
Notices
This computer kit is [designed by Sergey Kiselev]. Parts are readily available from various online market places. I only make a small commission to offset the cost of online selling fees and time spent testing, assembling and providing support for this kit.
