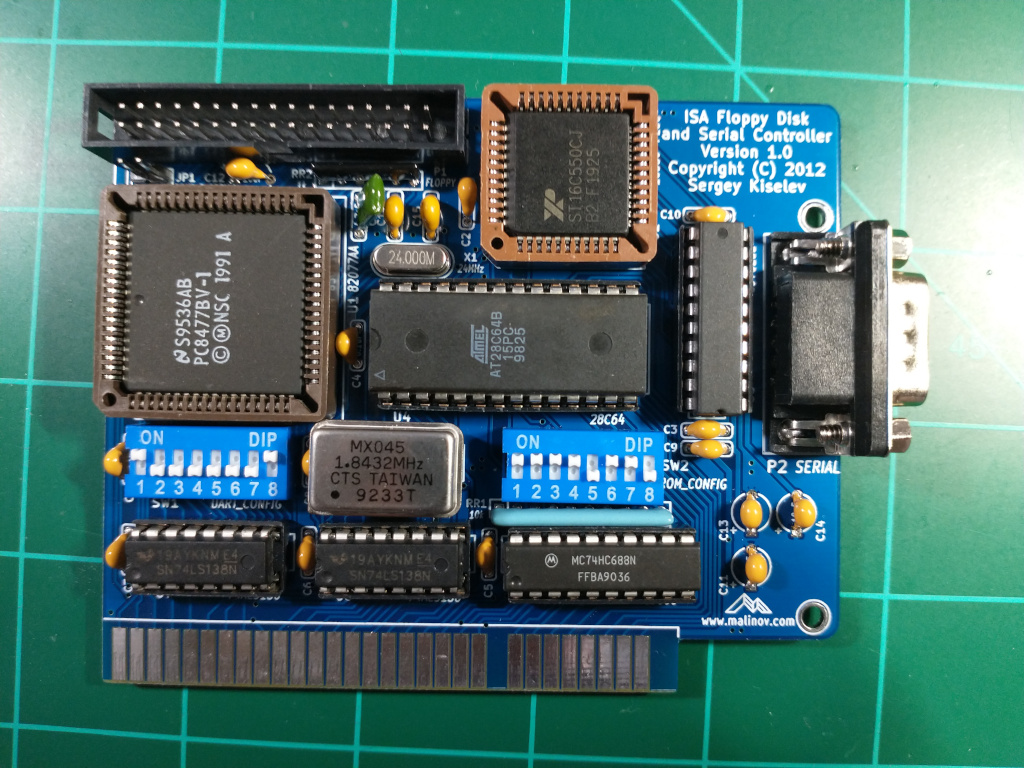
ISA Floppy Disk and Serial Controller
This is a place holder page for the ISA Floppy Disk and Serial Controller
Introduction
This is a ISA Floppy controller card which allows you to use a standard mechanical floppy drive or a goTek floppy emulator device on your IBM compatible computer.
How to Purchase
This kit is available on my eBay store https://www.ebay.com/usr/numberf55/ or for a 15% discount we can transact the old fashioned way. Contact me at support@noami.us or 1 347 604 2083 with your name and order details I will provide a total and instructions for payment by check. Once it clears the item will be sent out.
Board Assembly
Install the shorter components first this means installing them in the following order
- 24 Mhz Crystal
- Capacitors, resistor arrays
- DIP Sockets
- DIP Switches
- Square sockets
- Floppy connector
- 9 pin serial header
DIP Switch settings
A good starting point is to set the dip switch 2 and 8 ON. This will put Serial port on IRQ 4. and base address 0x3F8 (COM1).
Note: Only one of SW1.1 - SW1.4 should be ON. All switches can be off if software doesn't use interrupt based I/O. Note: One and only one of SW1.5 - SW1.8 switches should be ON.
For the ROM Address you can switch all of SW3 ON except 5 and 8. This will put the floppy controller ROM at address 0xE8000.
Note: If you are using the XT-CF or similar card then the floppy controller needs to be at a higher address.
See the original designer's website for detailed configuration of the DIP switches.
Initial Boot and Configuration
Check for shorts when plugging in the floppy controller into a slot for the first time.
After your system boots you will be prompted "Press F2 to run the Multi-Floppy BIOS configuration utility..."
During testing with goTek I entered this setup and deleted the 2 floppy entries and pressed w to save to bios since my system was driving the floppy controller. If your system is controlling the floppy then it will work even if you remove the floppy card EEPROM chip.
If your system does not have floppy defined then you would use the F2 setup utility to set up your floppy.
When Entering the p command it should print FDC 1 03F0, IRQ6, DRQ2 and nothing else. Using this configuration it booted successfully into MS-DOS.
Troubleshooting
The floppy drive works but the C drive is not detected.
This can happen if you have both the XT-IDE and floppy ROM Extensions installed on the same system where the XT-IDE is at a higher address. You will notice that the usual XT-IDE boot screen will not show. In this case make sure the floppy controller address is higher than the XT-IDE.
For example the floppy controller is at 0xC8000(lower) and the IDE controller is at 0xCA0000 (higher) then swap the addresses by adjusting the DIP switches.
System hangs during boot
The floppy BIOS needs to be configured (Press F2 during boot) see instructions above.
